
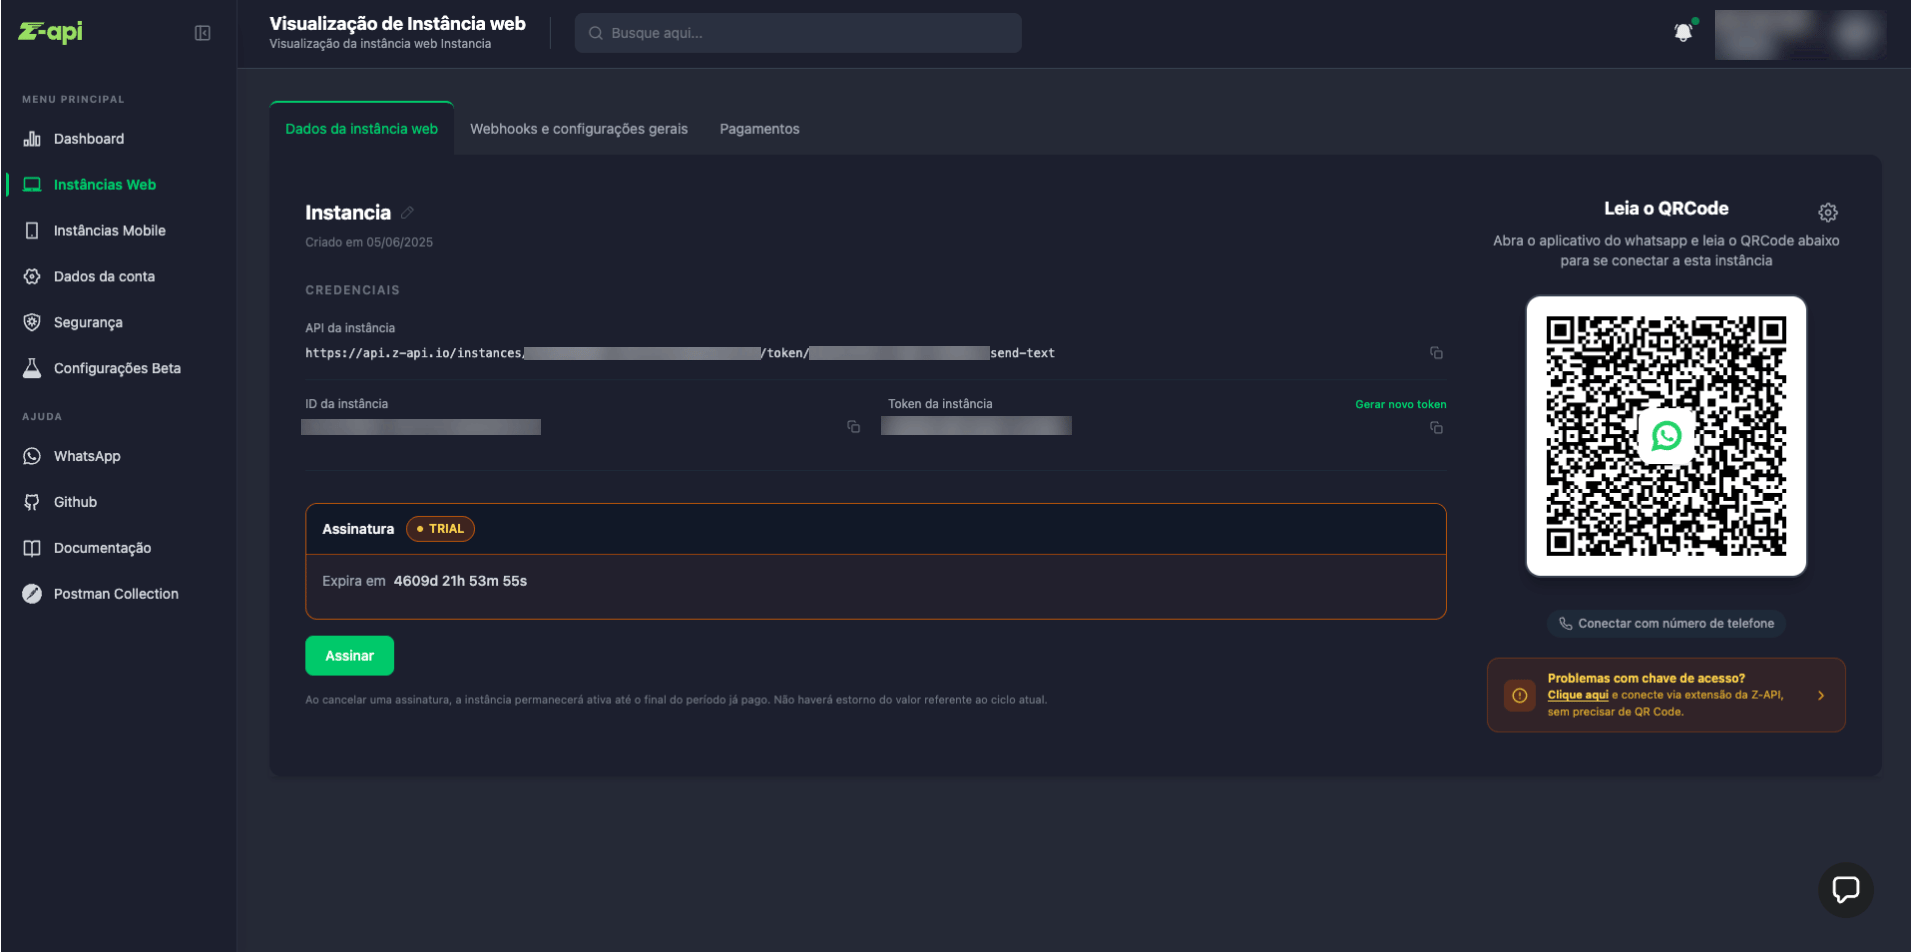
Overview
On some devices, WhatsApp now requires a passkey security verification to authorize new WhatsApp Web connections. When this happens, the end customer cannot connect the Z-API instance through the traditional QR Code flow.This behavior does not affect all devices. Therefore, do not replace the standard connection flow — implement the extension connection as an alternative option, displayed only when the customer reports difficulties connecting.
Partner responsibility
The responsibility flow is as follows:- Partner → calls the Z-API
extension-tokenendpoint to generate the code - Partner → displays the generated code in their own interface to the customer
- End customer → uses the code in the Z-API Conector extension to connect the instance
Token generation is the partner’s responsibility. The end customer should never have direct access to instance credentials (instanceId and token).
How to generate the token
Make an authenticated request to the token generation endpoint for your customer’s instance:Connection code to be displayed to the end customer (format
XXXX-XXXX)Unix timestamp (in milliseconds) with the code expiration date
What to display to the customer
Below is an example of how the Z-API dashboard itself displays the code to the customer — use it as a reference when implementing on your platform: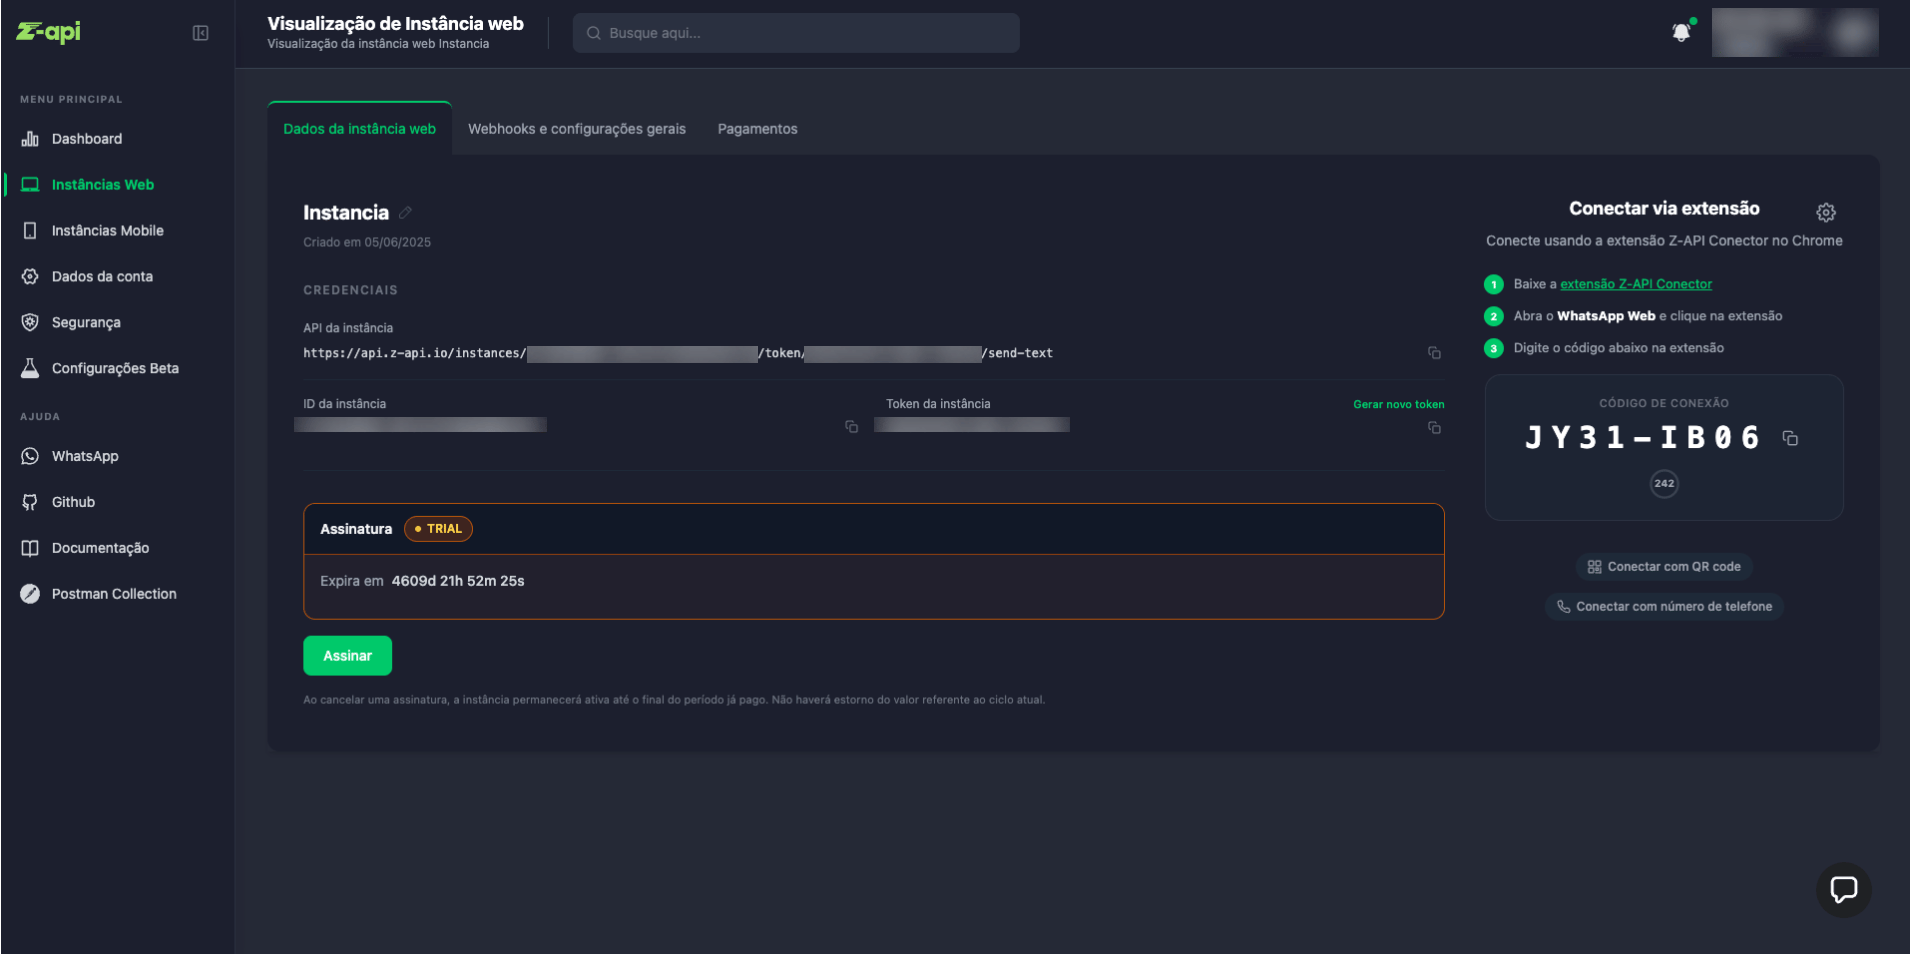
- The generated connection code (e.g.
FA48-HS63) with a copy option - A countdown timer showing the remaining validity time
- The link to install the Z-API Conector extension
- The steps the customer should follow after receiving the code:
- Install the Z-API Conector extension on Chrome
- Open https://web.whatsapp.com/ logged in with the number to connect
- Click the extension icon and type the code
- Confirm on the extension screen to complete the connection
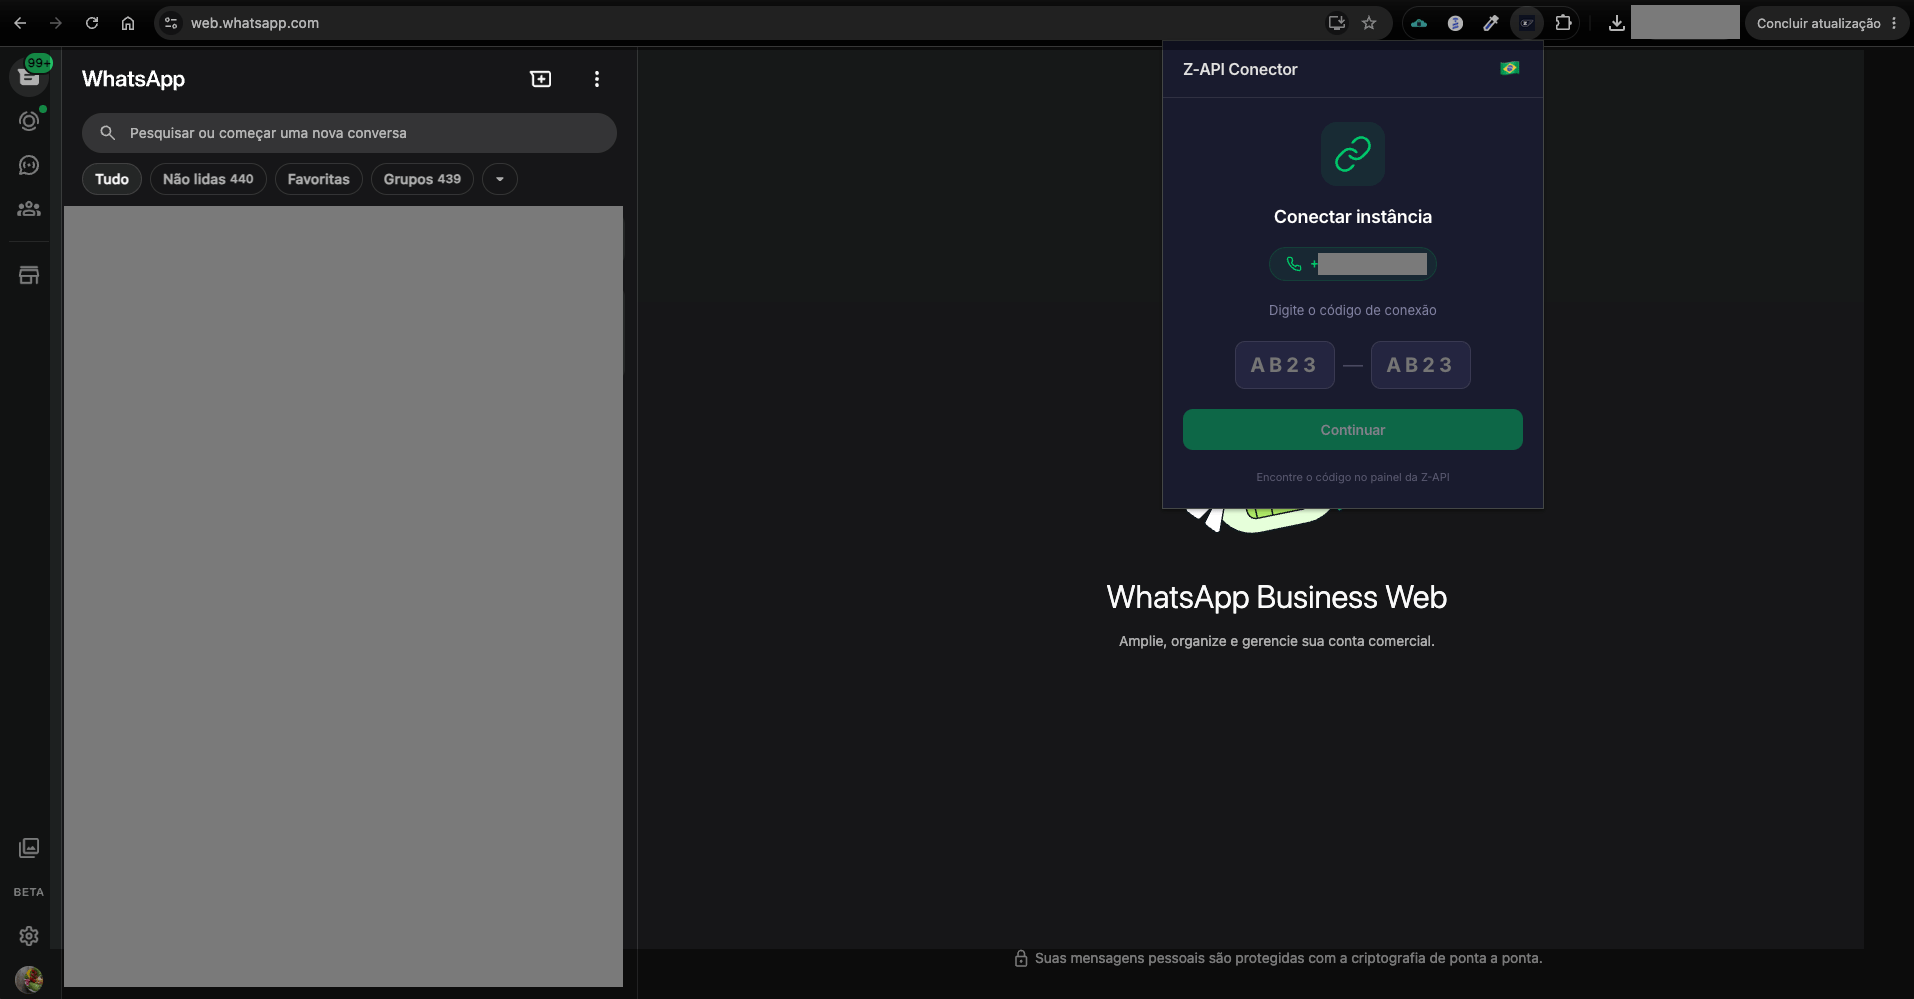
What the customer does with the code
After receiving the code generated by your platform, the customer should follow the steps below:1. Install the Z-API Conector extension
If not yet installed, the customer goes to the Chrome Web Store and installs the Z-API Conector extension.2. Open WhatsApp Web logged in with the number to connect
The customer opens web.whatsapp.com in Chrome, already logged in with the number that should be linked to the Z-API instance.3. Enter the code in the extension
With WhatsApp Web open, the customer clicks the Z-API Conector extension icon in the Chrome toolbar. The extension detects the logged-in number and displays the fields to type the connection code (formatXXXX-XXXX):
4. Confirm and connect to Z-API
After entering the code, the extension displays a confirmation screen with the instance name, detected number, and a countdown timer. The customer clicks “Conectar na Z-API”: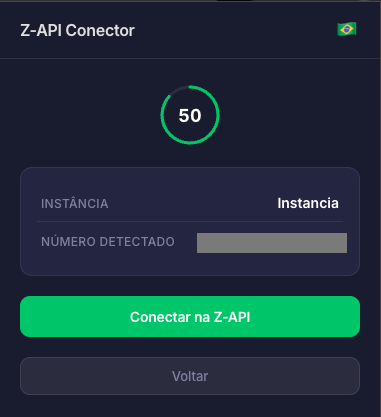
Final considerations
- The partner’s backend should be the only one calling the
extension-tokenendpoint; never expose this call on the frontend - Guide your customer to have WhatsApp Web open and logged in before entering the code in the extension